How to grow new hibiscus from cuttings, and how to graft your favourite varieties onto strong rootstock, with step-by-step photos by Wally Morgan.
Many of the fancy exotic hybrids grow slowly, or not at all, on their own roots, so they’re usually grafted onto a vigorous rootstock. Hardier varieties grow well from cuttings, and cuttings are also how you grow rootstock for grafting.
On this page: Choosing rootstock · Cuttings · Grafting basics · Side graft · Wedge graft · Rind (bark) graft · Standards · Recycling a failed graft · Air layering
Choosing rootstock
Good rootstock varieties strike easily from cuttings and grow vigorously. Popular choices include albo-lacinatus (‘Ruth Wilcox’), landersii (‘Pride of Hankins’), archerii and ‘Pink Psyche’. Wally’s advice: “You can even use any vigorously growing plant that is spare if you have nothing else available. Sap flow is all you need to be successful.”
Feed and care for your rootstock plants. Vigorous new growth that is 6 to 10 months old roots well and makes the best understock.
Cuttings
Tip cuttings
Tip cuttings need a moist, even temperature of about 22–27 °C and a well-drained mix, so take them in the warmer months, September to April being the most suitable time.
- Make a mix of about 3 parts clean, coarse, sharp sand to 1 part peat moss. Put some crushed brick or similar drainage material in the bottom of a propagating box, then about 12 cm of the mix. Water gently to settle it.
- Take cuttings about 12–15 cm long, cut cleanly across just under a leaf node. Remove some of the lower leaves and halve a few of the larger remaining ones.
- Use a nail or dibble stick to make 4 cm holes, push the cuttings in gently, and firm them (don’t ram them). Don’t plant too deep. Water again.
- Cover the box (traditionally with a sheet of glass) but leave it raised slightly for ventilation. Keep the mix moist but not wet.
- Keep the box somewhere with a steady temperature, such as the filtered morning sun of an easterly aspect. Roots should appear in 4–5 weeks.
- Once the cuttings are growing well, gradually give more ventilation over several days to harden them off, then open the lid completely for about a week before potting into 10 cm pots.
Hardwood cuttings
Method by Allan Little. Hibiscus strike readily from hardwood cuttings and normally root in 4–6 weeks. Take them in spring and summer (or all year round if you have a hothouse).
- Use straight wood of pencil thickness or a little larger. Remove all the leaves and trim to about 10–15 cm long.
- Make a cut at about 45 degrees just below a node at the base. You can “wound” the base by shaving a sliver off one or two sides for 2–5 cm to expose more cambium, which increases the area that produces roots.
- Dip in rooting hormone (powder, liquid or gel). This is optional but gives earlier striking and stronger roots.
- Plant in individual tubes or small pots. Coarse river sand works but dries out easily; adding some peat or perlite helps hold moisture.
- Keep them in a shadehouse, out of the wind, and pot on into good-quality potting mix once they’ve struck.
Wally’s tips for cuttings
- Uniform cuttings of about 10 cm, with about a third in the mix, work well.
- Don’t leave big leaves. Cut back to a small bunch of half-leaves, and remove all flower buds.
- On larger cuttings, cut off all the twigs but leave a stub that may shoot. Green twigs pull moisture from the cutting and make it shrivel.
- Avoid garden soil, which is full of rot bacteria. Straight perlite, or 5 parts perlite to 1 part peat, gives cuttings a clean start.
- A small plastic bag tent or a cut-off soft-drink bottle keeps the humidity up, but keep it in filtered light, not sun, or you’ll cook them.
- Water well, then only when dryish. Wet feet rot cuttings quickly. A little fungicide in the watering can at first and every 10 days or so helps.
- Cuttings live off stored starch for the first few weeks and may shoot before they have roots, so don’t be fooled. You need night temperatures above about 15 °C. When new leaves reach full size (around 6 weeks) roots have usually formed.
- The tent can come off after about 4 weeks. Pot up individually into 8–10 cm pots once roots show through the drainage holes.
Grafting basics
“Grafting is just a method to connect the sap-flow of the rootstock to that of the scion, and it doesn’t need much,” says Wally. “I’ve seen all sorts of funny results with only a fraction of the cambium sap layers making connection, but the plant still thrives.” There are many grafting methods. Some look neater than others, but if it’s just for yourself, use whichever works for you.
- You’ll need: rootstock (unrooted cuttings or potted plants, from pencil to finger thickness), a sharp knife, grafting tape and labels, and a scion (a piece of the variety you want to grow).
- Practise your cuts on scrap prunings first. You’ll need lots of practice.
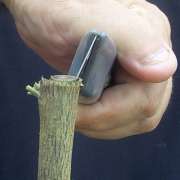
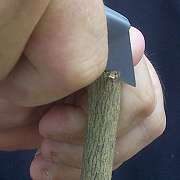
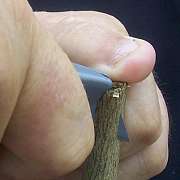
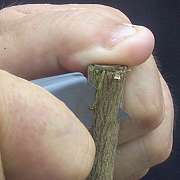
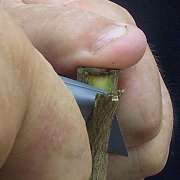
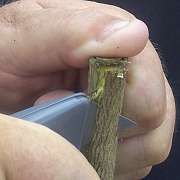
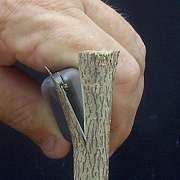
- Keep the knife angle constant, use firm pressure with a rocking forward-and-back motion rather than a hard shove, and avoid “scooping”: you want flat cuts, not curved ones.
- Tough tape can pull soft wood in to close small gaps.
- If you’re grafting onto a rooted cutting in a tube, pull upwards on the rootstock with one hand while cutting downwards, or the pressure may snap the roots.
Aftercare
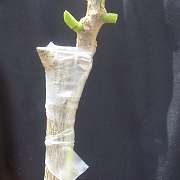
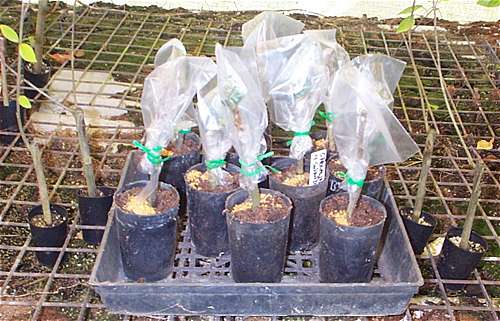
- Cover the new graft with a plastic bag “hat” to keep the humidity up, unless you have a humid glasshouse. About two weeks is all it needs.
- Remove the tape after 4 to 6 weeks, depending on how warm it’s been.
- Then rub off any remaining eyes (buds) on the rootstock, so all the growth goes into the new variety.
The side graft
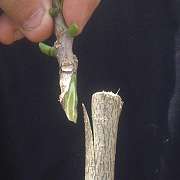
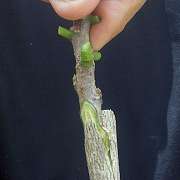
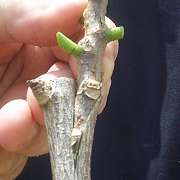
The easiest technique for many people. Make a downward slanting cut into the side of the rootstock using the rocking motion, check the depth, cut the scion to a matching flat wedge, slide it in, check the fit and wrap it firmly.
The wedge graft
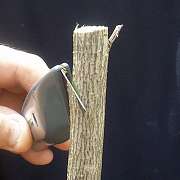
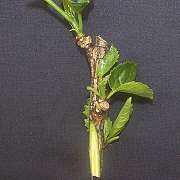
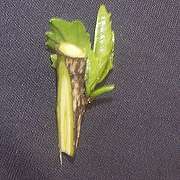
Wally’s favourite, and the one he uses most. The scion can be as small as a single-node “bud”. Two cuts are made in the rootstock, the bottom cut at about 45 degrees. The scion gets a long cut on one side and a short 45-degree cut on the other, so that it locks into the slot.
The rind (bark) graft
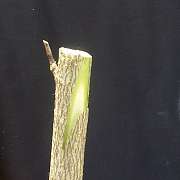
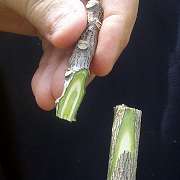
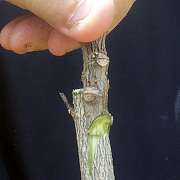
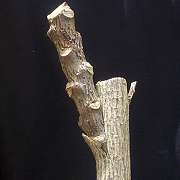
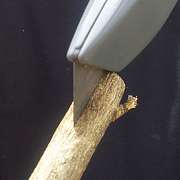
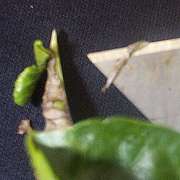
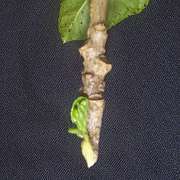
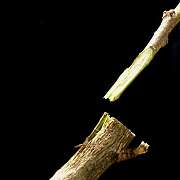
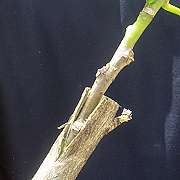
A lifesaver when someone gives you a thin piece of wood to graft. Thin rootstocks aren’t always successful, but a thin scion on a thicker rootstock has “almost 100%” success for Wally.
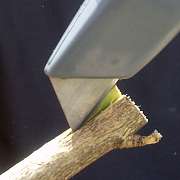
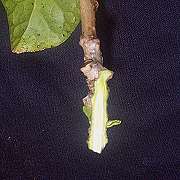
- Lay the knife along the bark and push gently in to the wood. Twist gently each way to lift the bark from the wood. (Go opposite an existing node for one graft, or make two slits a quarter of the way round each side to insert two.)
- Cut the scion with a long, flat cut from side to side, and trim a little ledge on the back so it slides under the bark more easily.
- Shave a fine whisker off each edge to expose the cambium so it connects better with the sap flow, then insert and wrap.
Grafting standards (hibiscus “trees”)
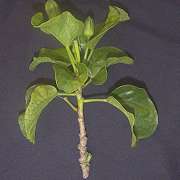
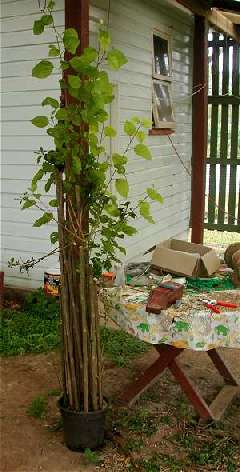
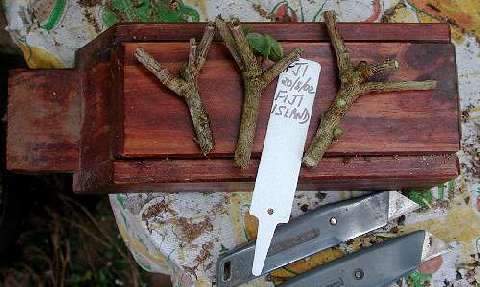
- Strike a number of long cuttings a few weeks in advance to make the “broomstick” trunks.
- Choose scions with 2 or 3 branches, to give a full head of foliage as they take.
- Top the broomstick and cut 2 or 3 even slots spaced around the crown.
- Give the scions a simple V-trim and insert them with the branches pointing outwards.
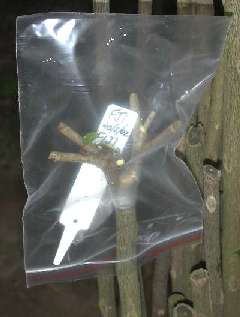
- Wrap the wood together to keep the cambium layers in good contact, then cover with a zip-lock bag for a couple of weeks to stop the scions drying out while the sap starts to flow.
Recycling a failed graft
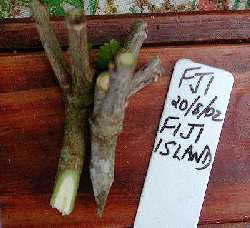
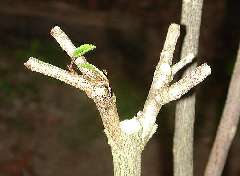
Don’t throw away a rootstock when a graft fails. Shave back the old graft scar until the cambium is fresh all round, and a new scion can be cut to fit. If the rootstock is long enough, it’s neater to cut the whole top off and do a fresh wedge or side graft.
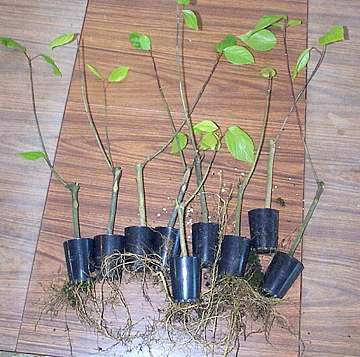
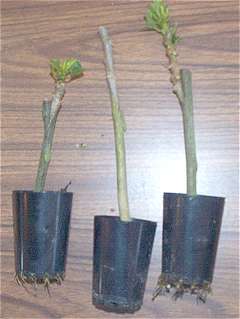
Another option is the whip-and-tongue graft: matching angled cuts on rootstock and scion, each with an extra cut parallel to the stem about a third of the way down, so the two pieces lock together. Repot the finished plants and keep them bagged for 2–3 weeks under shade.
Air layering (marcotting)
Air layering roots a branch while it’s still on the plant:
- Remove a band of bark 1–2.5 cm wide from a branch at least 1 cm thick.
- Wrap the wound in moist sphagnum moss, seal it in plastic and tie it with tape or string.
- Wrap the plastic in newspaper or foil to shade the new roots.
- After 3–4 months, when roots have formed, cut the branch off below the moss and plant it.
It works, but Wally recommends grafting as much more efficient if you have access to easy-to-strike rootstock wood.
Learn it hands-on. Grafting is much easier once you’ve seen it done. Come along to a meeting and ask our experienced members for a demonstration.
Propagation and grafting notes and photographs by Wally Morgan, from his website The World of Hibiscus, used with his kind permission. Hardwood cutting method by Allan Little. Lightly edited for this website.
See also: Growing Hibiscus · Cultural Notes · Societies & Registration